

1. Enter connection details
On Details:- Confirm or change the Connection Name.
- Enter the provider host, URL, tenant information, or credentials requested for that product.
- Use a dedicated service account or API credential.
- Select Next.
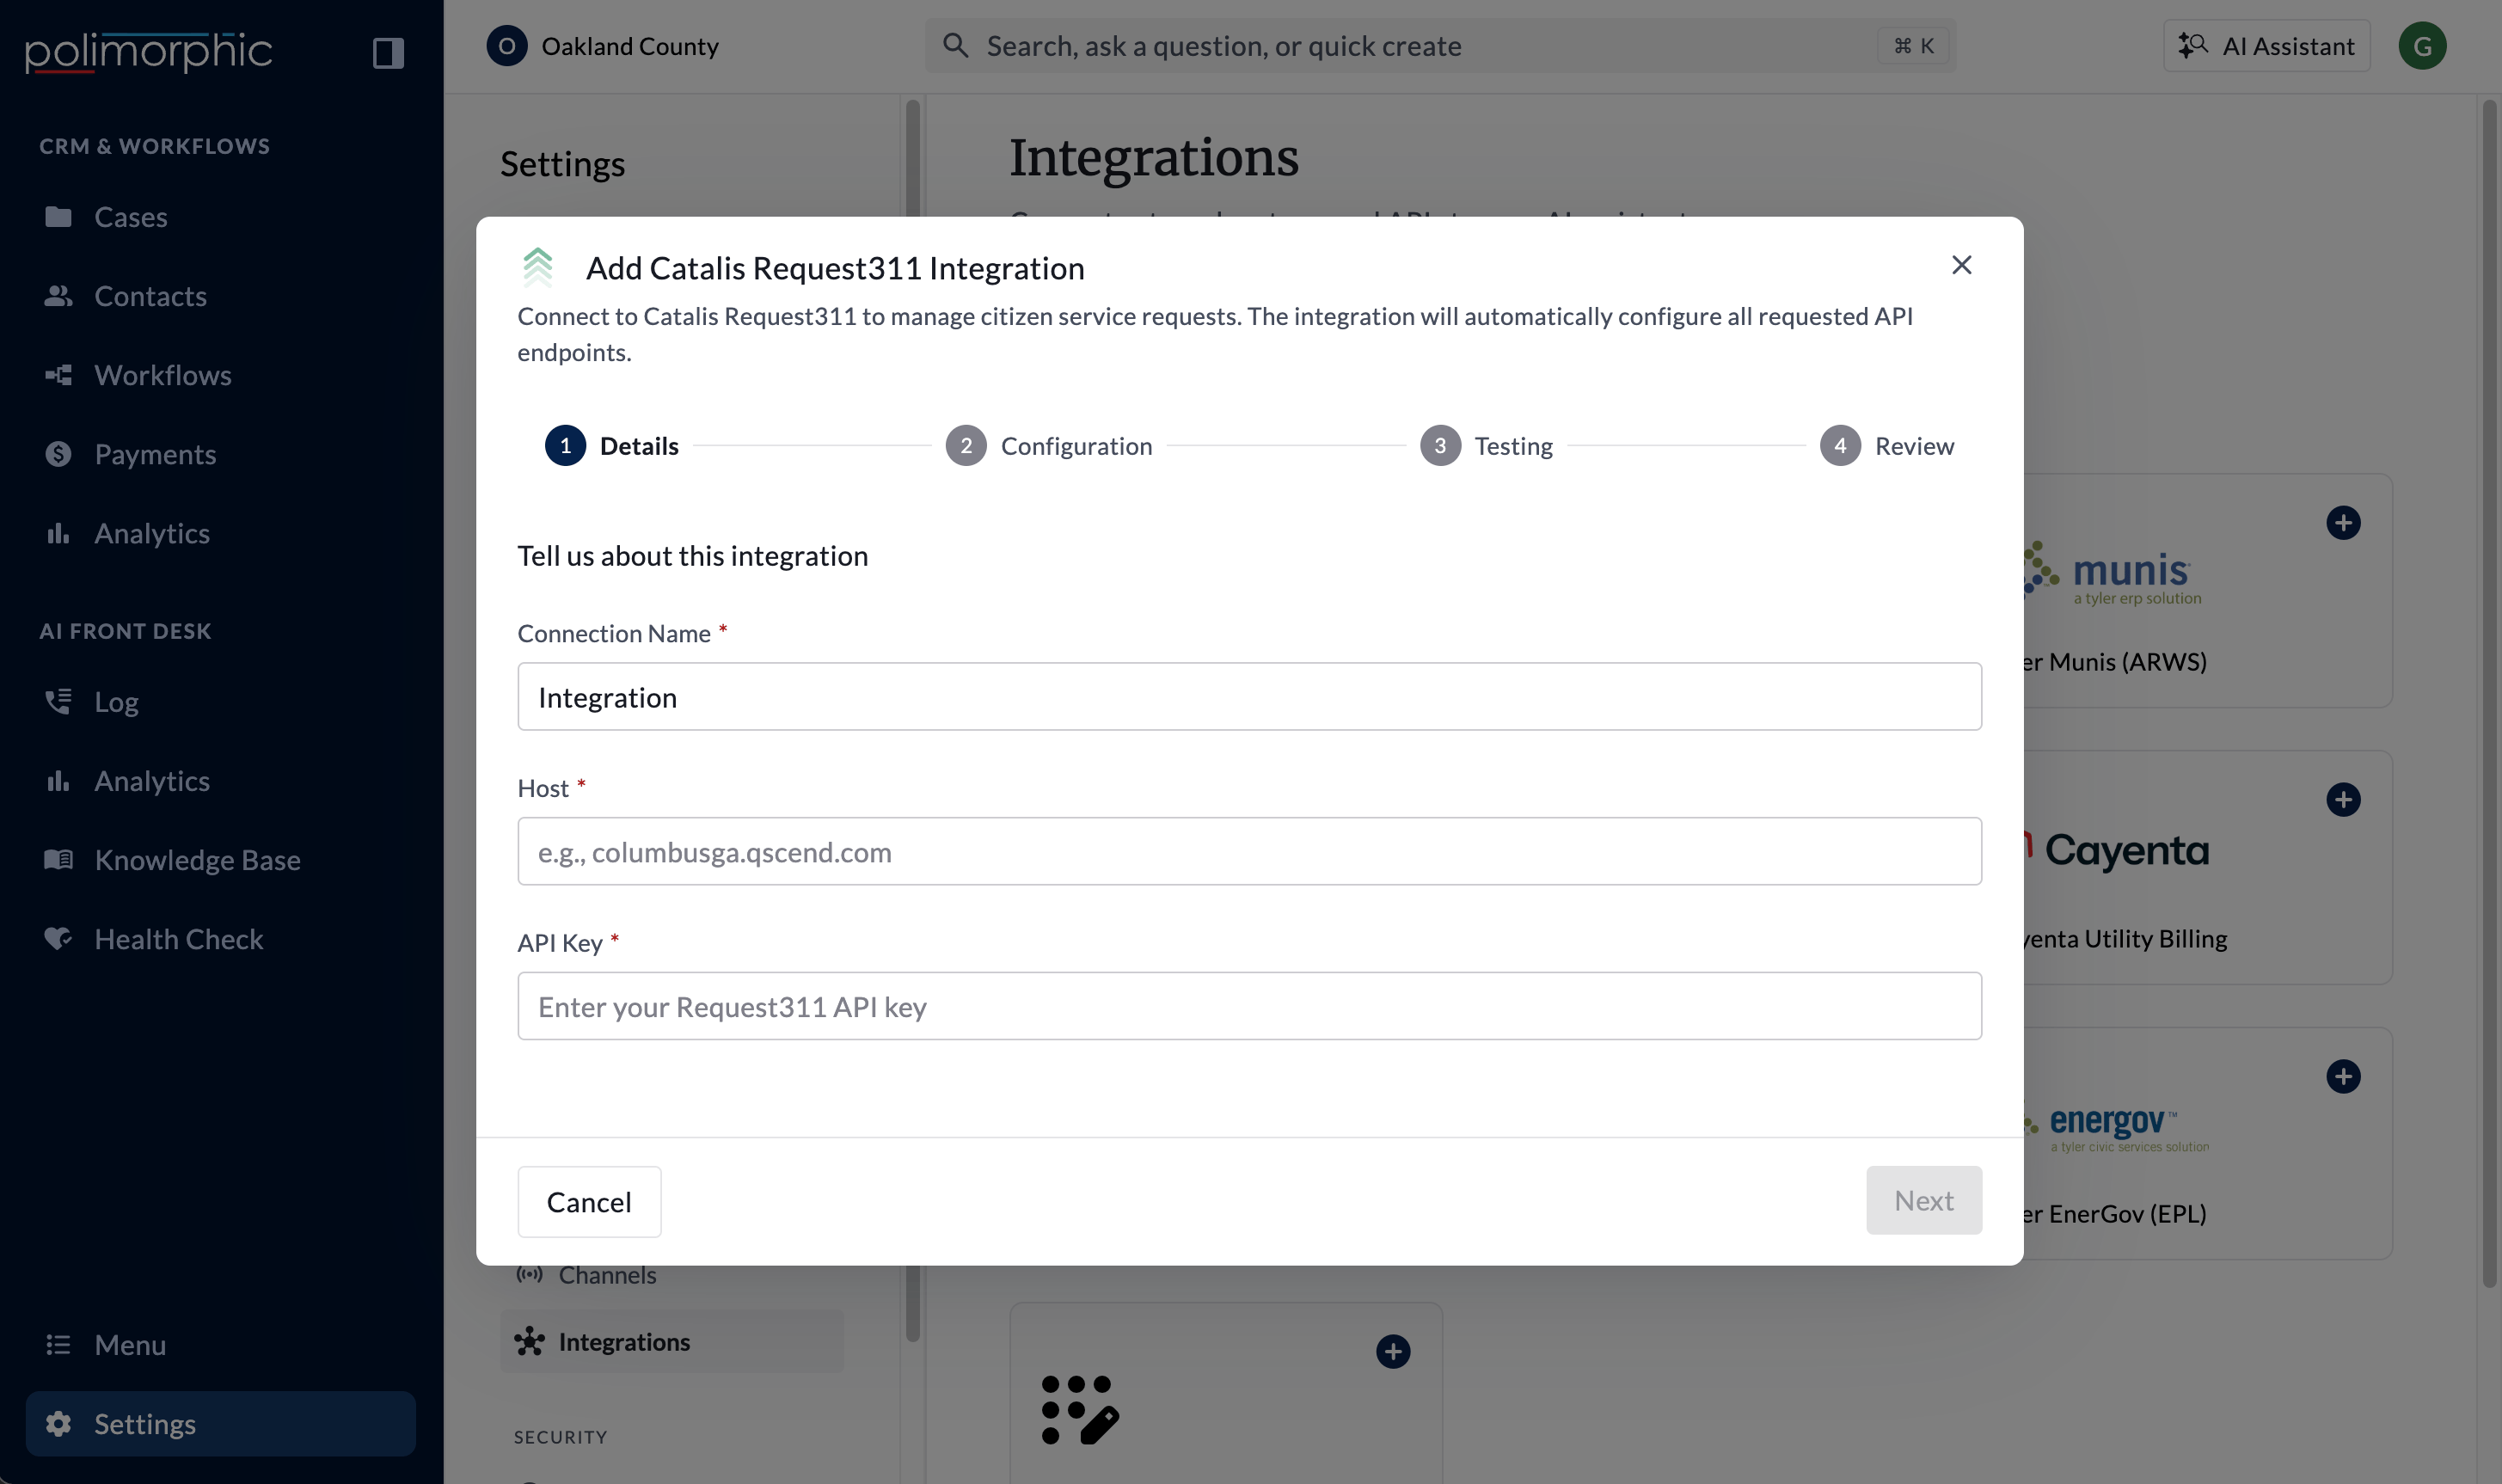
https://, while other fields require a complete URL.
If the form shows a connection name or values from a different provider you opened earlier, select Cancel and reload the Integrations page before continuing.
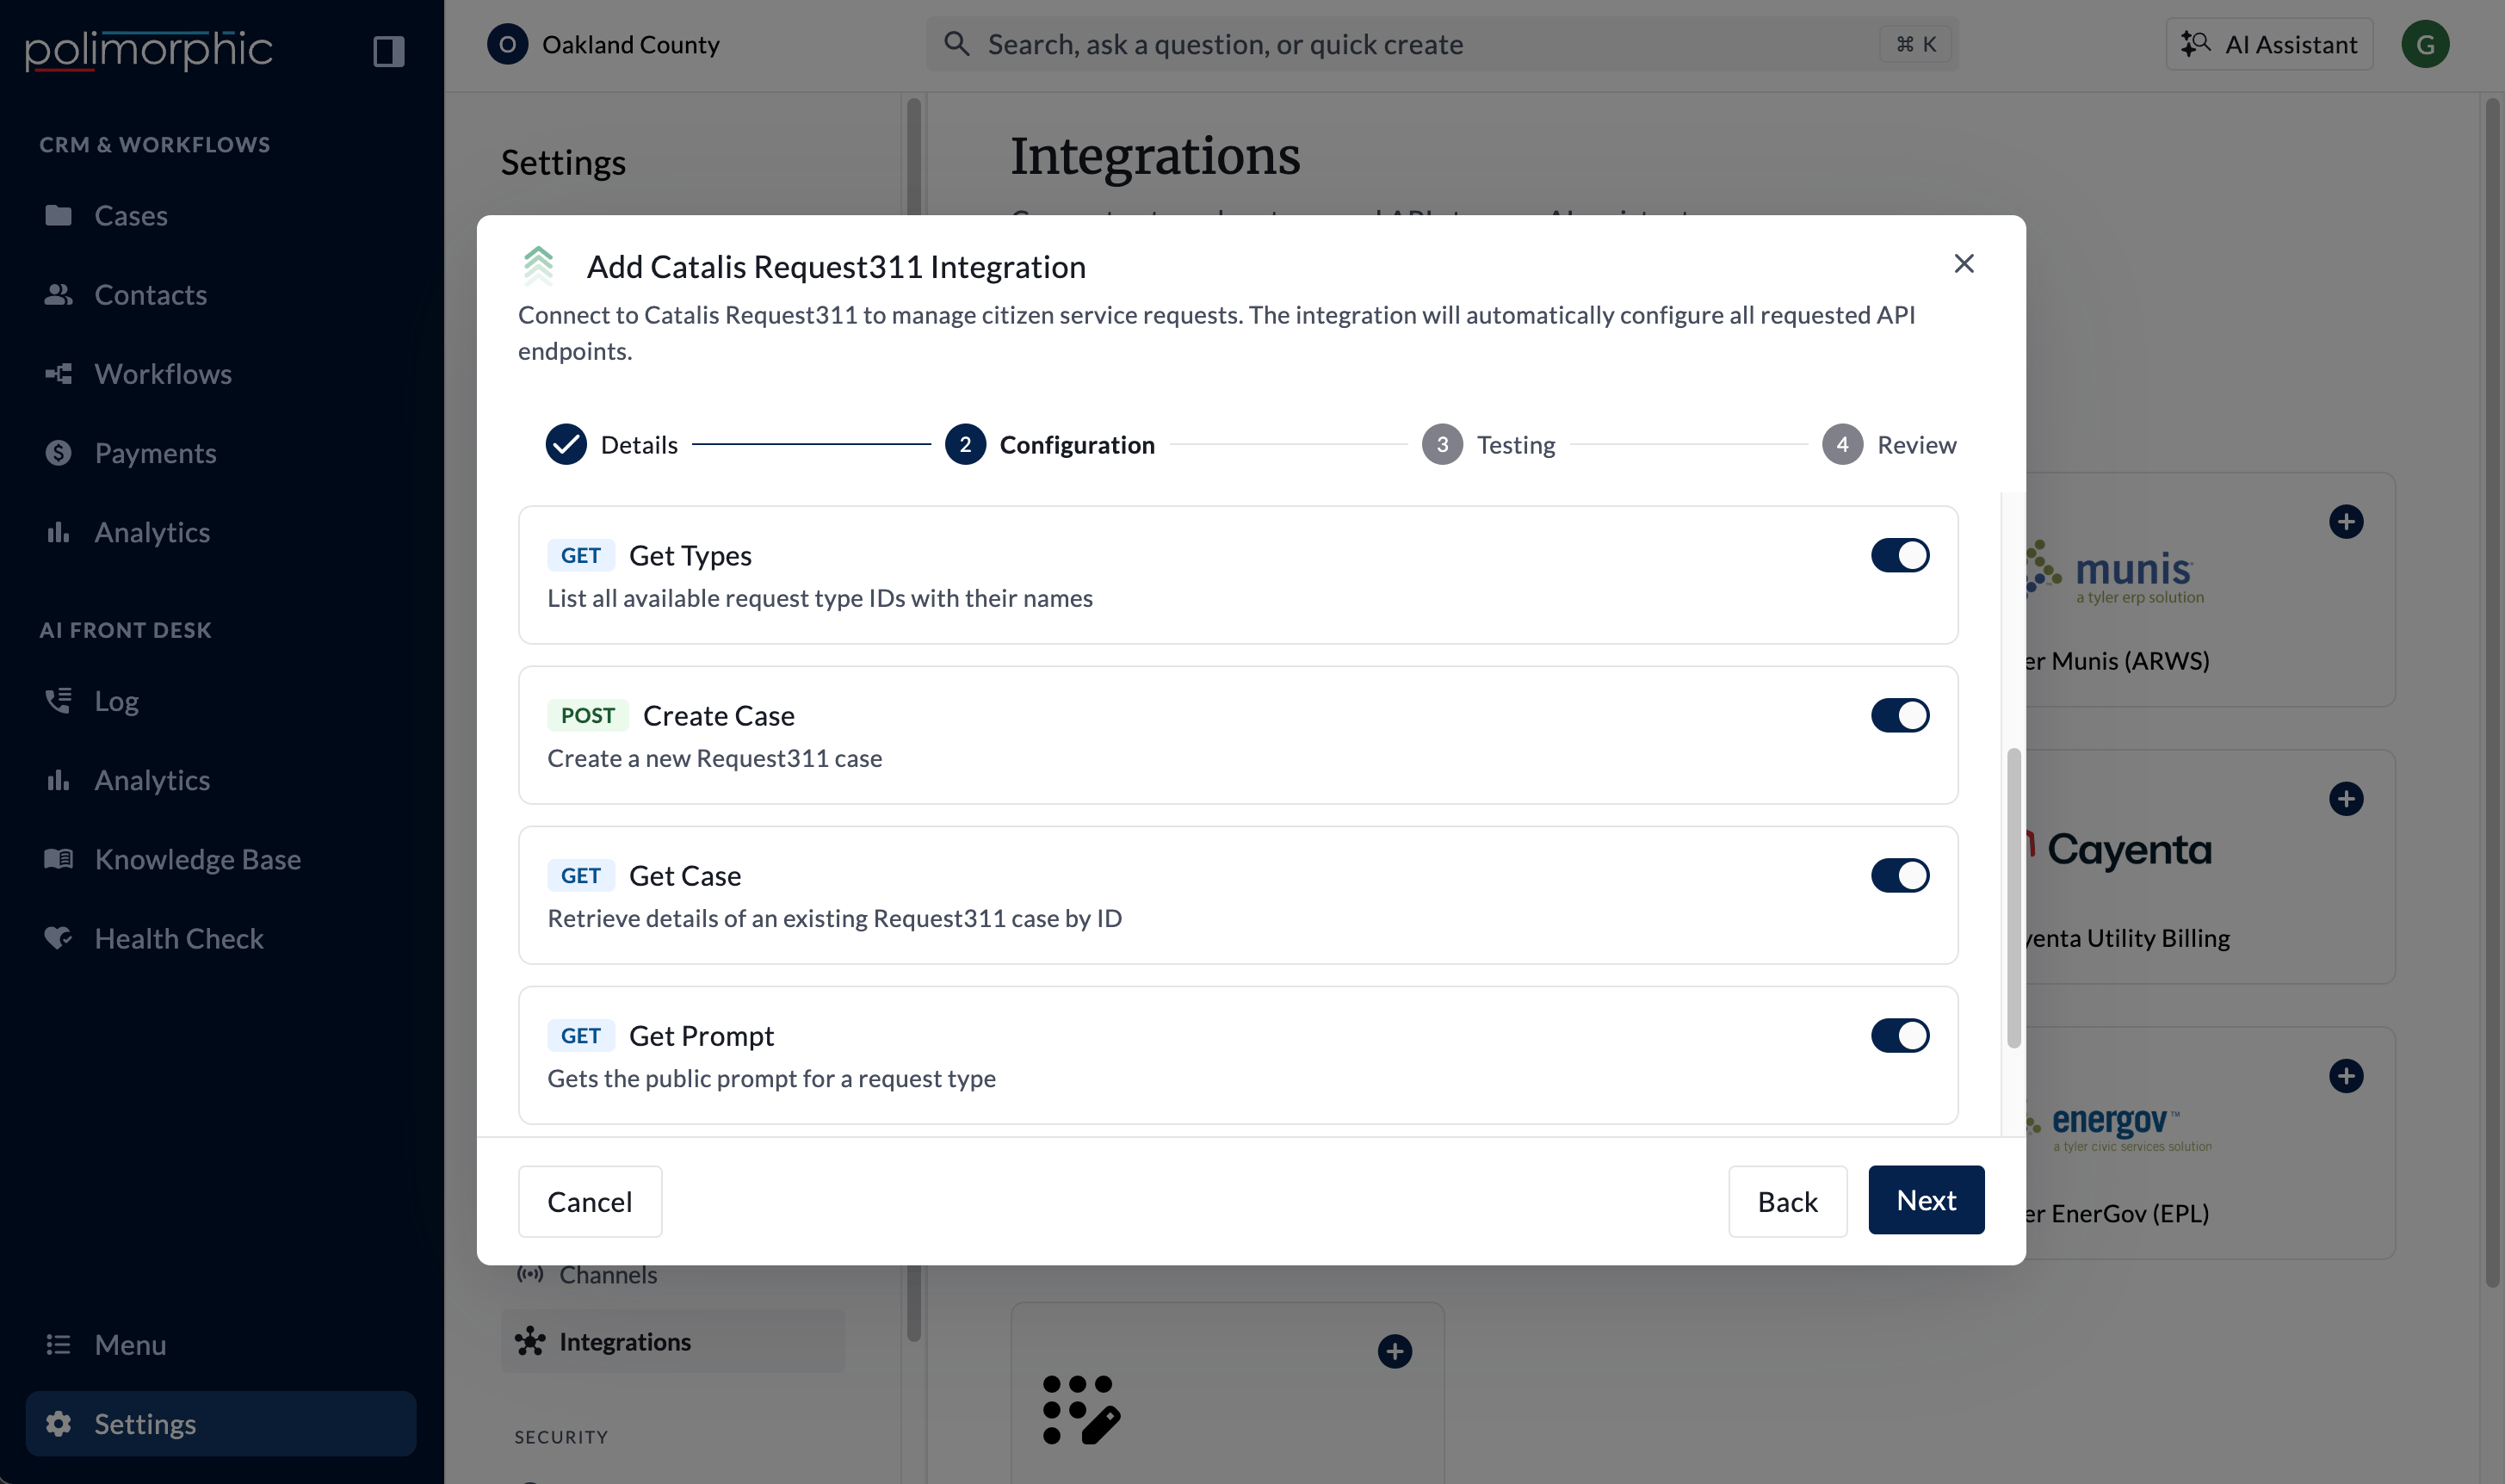
2. Pick what the integration can do
On Configuration:- Review the listed API capabilities.
- Turn off any capability your organization doesn’t plan to use.
- Complete any product-specific choices, such as required submitter fields or an access mode.
- Select Next.
3. Check the test results
The Testing step starts automatically. Polimorphic safely tests capabilities when the check can be completed without creating or changing provider data.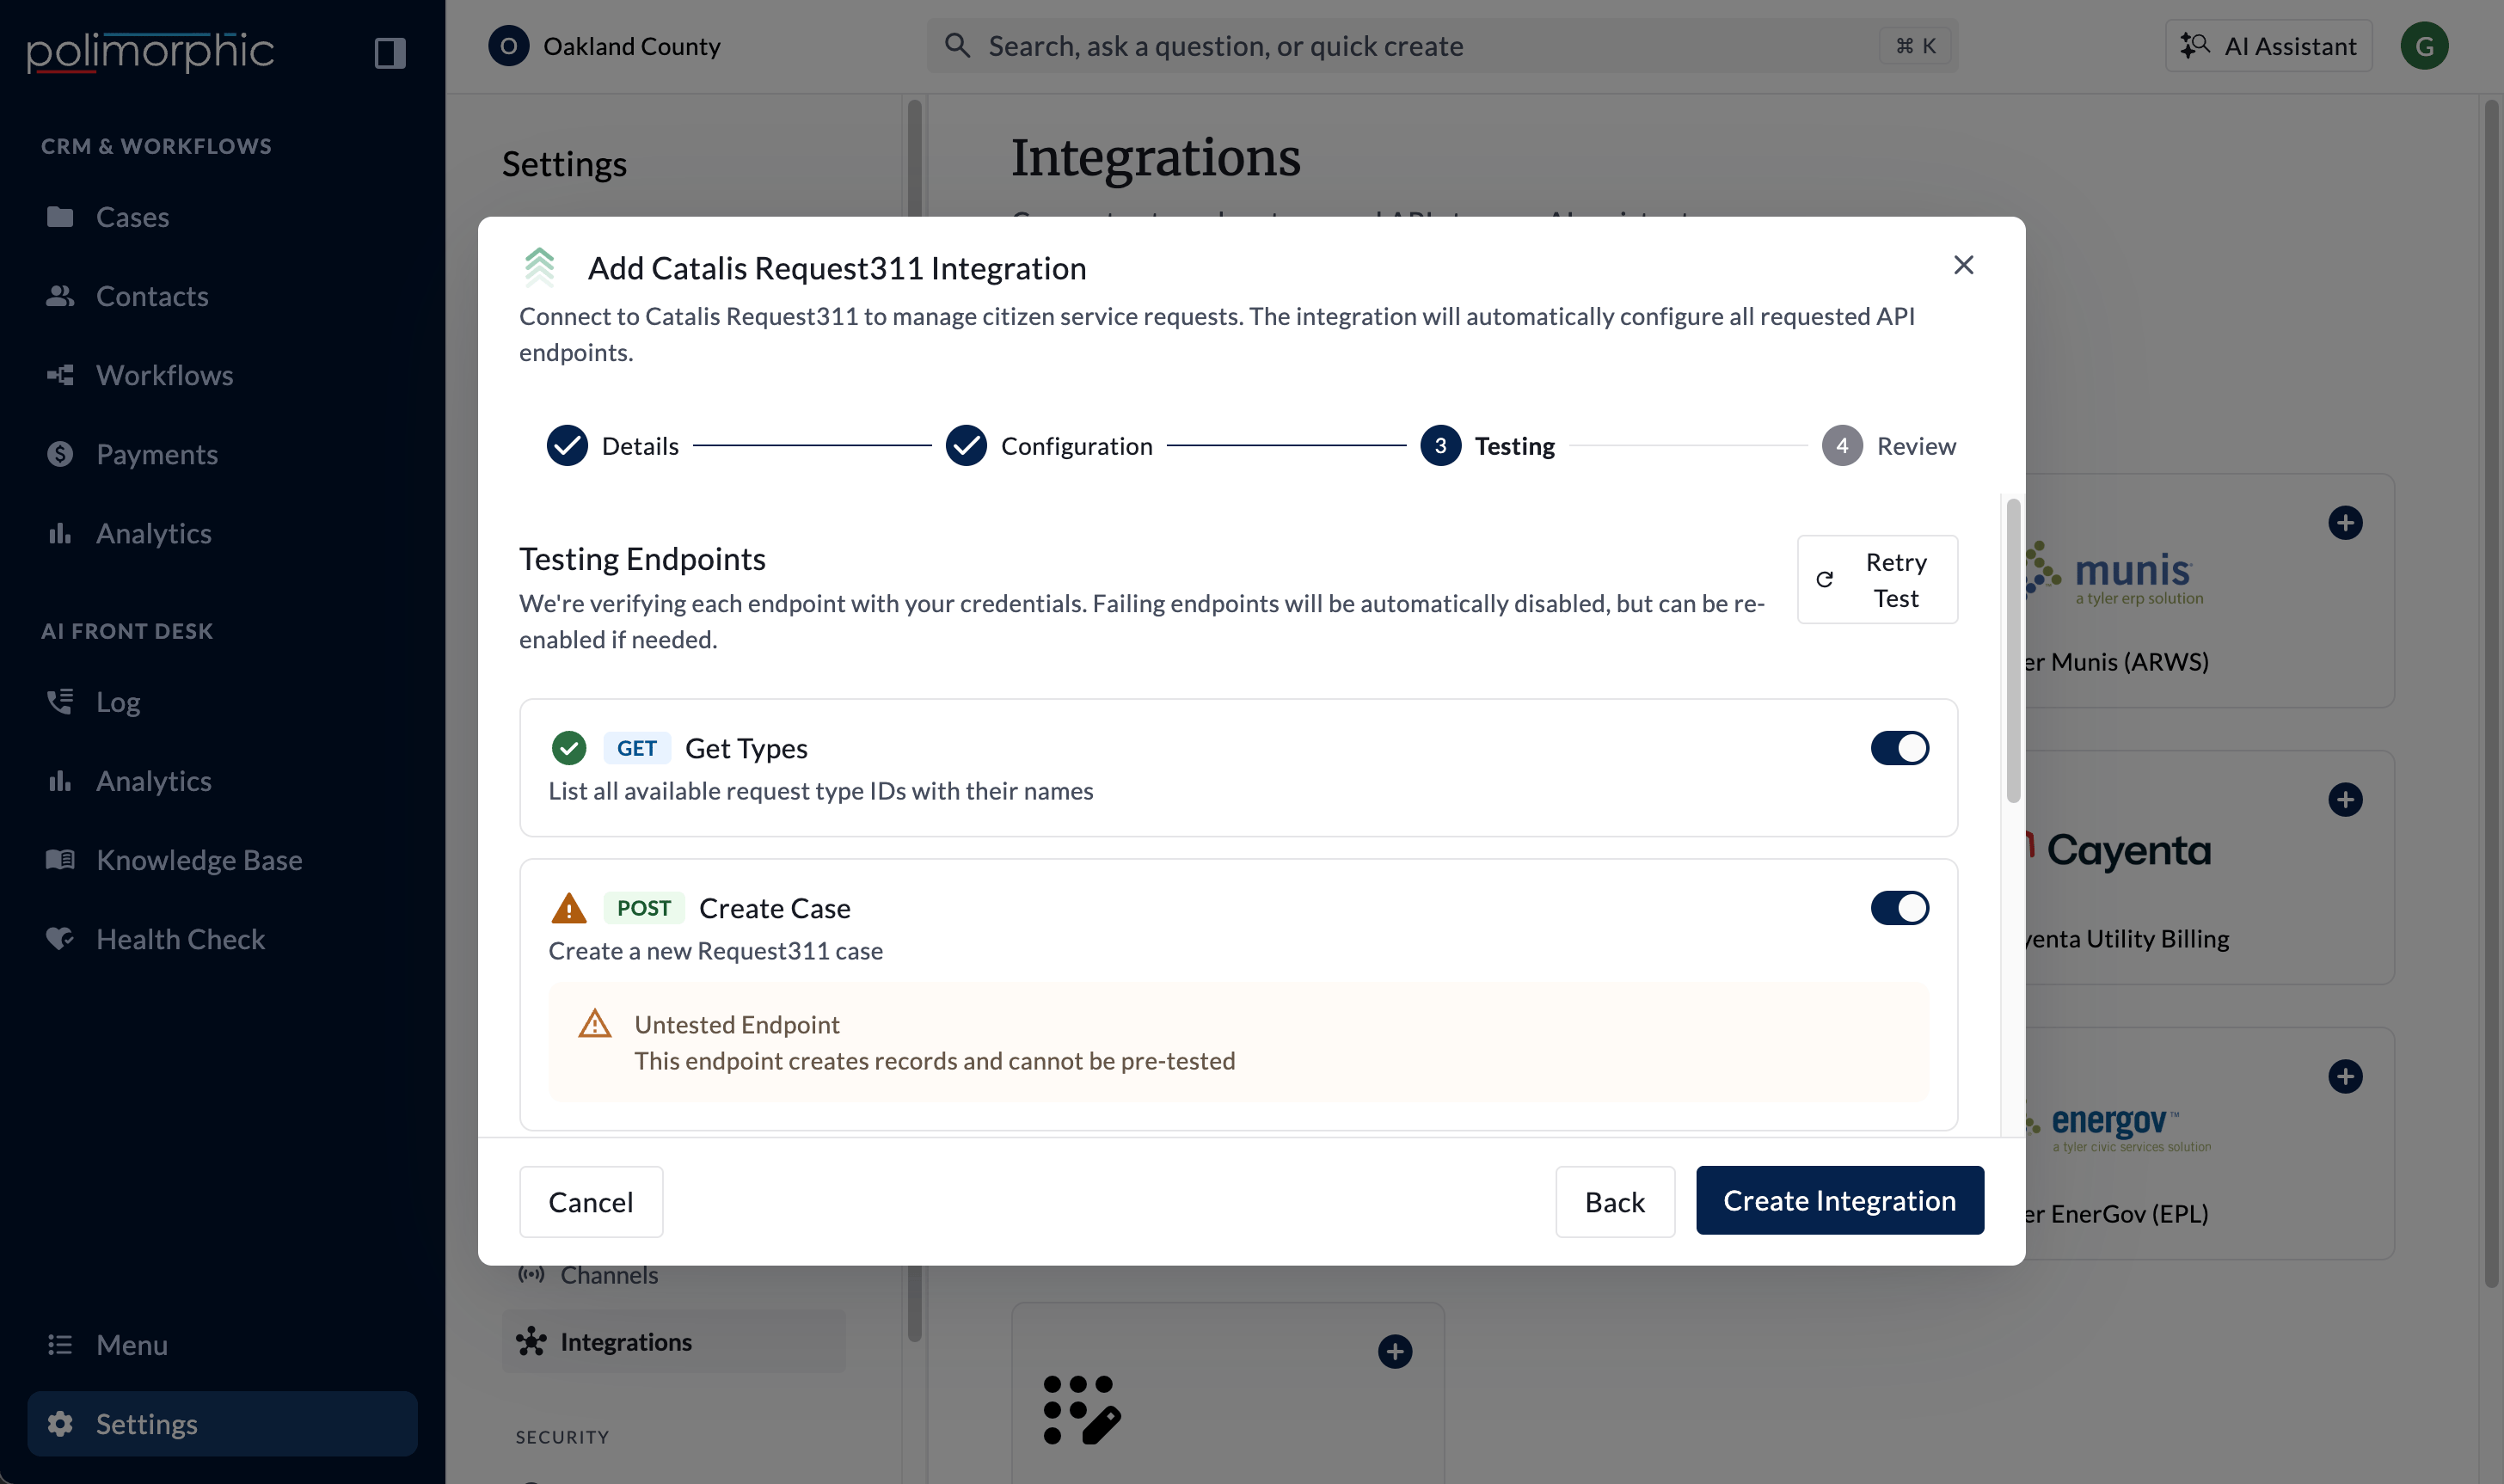
- Successful: Polimorphic reached the provider and received an acceptable response.
- Failed: The testable capability returned an authentication, permission, connection, timeout, or response error. Polimorphic switches a failed testable capability off in the setup screen.
- Untested Endpoint: The check needs a real record identifier, personal verification data, or a request that would create or change provider data. An untested result isn’t a credential failure.
4. Create the integration
Select Create Integration after reviewing the test results. This creates the connection and closes the setup window. The new connection appears under Connected Integrations on the Integrations page. Creating the connection doesn’t replace an end-user test. Test each newly connected capability through Chat, Voice, or Assistant before staff or residents rely on it.Choose where the integration is used
Under Connected Integrations, open Configure for the new connection.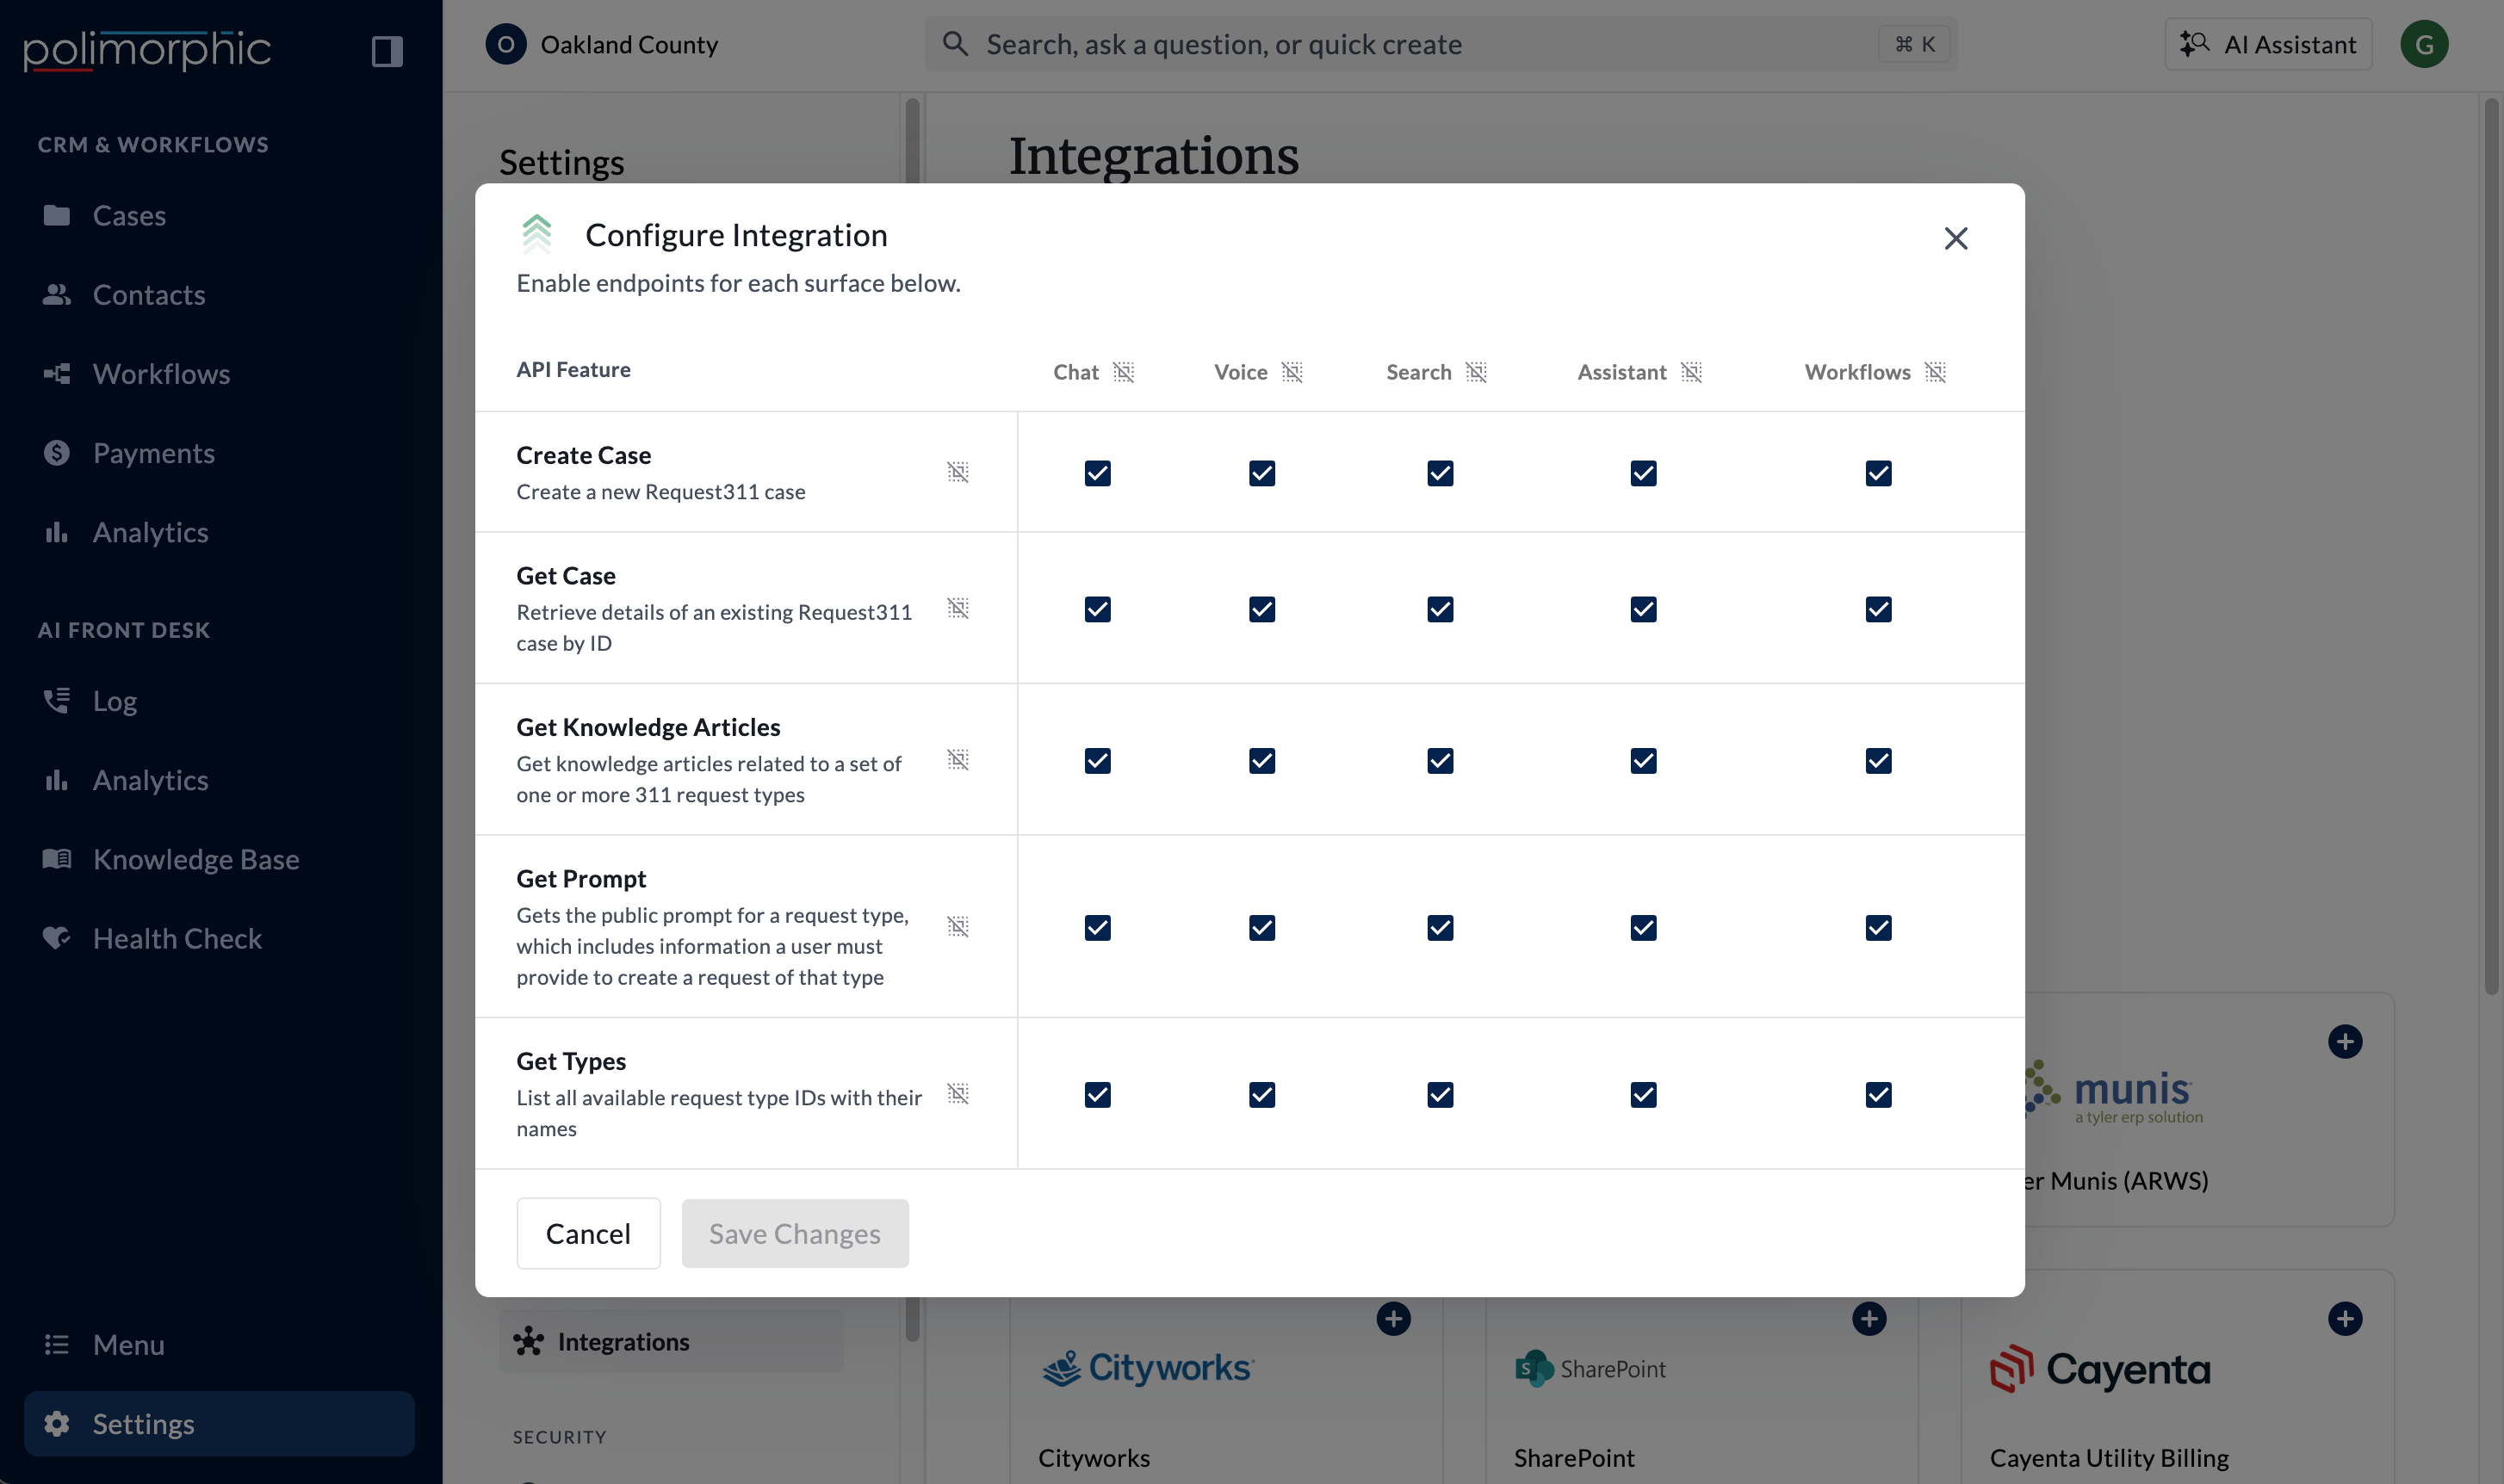
- Chat
- Voice
- Search
- Assistant
- Workflows